Reference the following guide to assist in general maintenance and seal replacement for all OILCO Liquid Handling Systems o-ring design swivel joints. Take all due safety precautions when assembling and operating these units. Handle all components with care. If there is something unique to the assembly not covered in this form, contact the factory.
Lubrication guidelines
All OILCO swivel joints are supplied with a grease fitting at each plane of rotation. General lubrication should be performed on a programmed basis (e.g. bi-annually, quarterly, or monthly), depending on service and operating conditions. When service is severe, such as high temperatures, heavy loads, or constant rotation, daily lubrication may be required. Consult the factory.
Inject grease and rotate the unit (as allowed by installation) as it is applied to ensure an even application throughout the raceway. Do not over-lubricate, as this may displace the seals and result in leakage. The table below offers a suggested volume for servicing based on a bi-annual program (where operational conditions are fair). Note that the volumes suggested are for vacant mechanical cavities – should lubricant be present and at a good viscosity level, less can be applied during the maintenance procedure.
| Swivel Size | Volume |
|---|---|
| 2″ | 1.5 ounces |
| 3″ | 2 ounces |
| 4″ | 3 ounces |
The generally recommended lubrication for use with Buna “N”, Viton “A”, neoprene, and Teflon seals is a grease containing a minimum of 5% Molybdenum Disulfide (Molylube SP Lubricant 5). [Note – This grease should not be used with EPT or butyl seals.]
- Recommended grease for oxygen service swivel joints is Halocarbon No. 25-10M.
- Recommended grease for ethylene-propylene-terpolymer (EPT) butyl and silicone seals is Silicone No. 1023 grease (also manufactured by Bel-Ray), or any other non-petroleum-based lubricant.
Component Information
80 Series Complete Repair Kit
| Main Pressure Seal | (1) large o-ring |
|---|---|
| Environmental Dust Seal | (1) low drag felt |
|
Radial Ball Bearings Standard Dual Raceway |
(46) 2” unit size (64) 3” unit size (78) 4” unit size |
| Ball Bearing Cap Screws | (2) threaded cap screw |
| Grease Port Fitting | (1) standard fitting |
Note: Additional components and considerations may be required for “HD” (heavy-duty) swivel joint models or those with secondary applications (e.g. sealed for submerged service).
Caution: Any improper handling or disregard for both onsite safety and operational procedures or factory recommendations could cause unnecessary damage to the unit and severe personal injury.
Warning: Never exceed the rated working pressure of the unit. Never modify or alter a unit beyond that to which it has been designed. Should any unit appear damaged, remove it from service immediately and contact the factory.
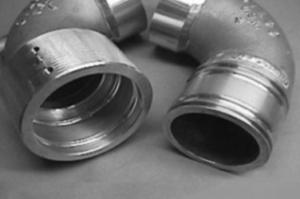
STEP 1: Remove the ball retainer screws. Add a sufficient amount of solvent into each raceway to flush out the lubricant. Rotate the sleeve, catching the balls as they fall out. When all the balls have been removed, the body and sleeve may be separated. Discard old seals. Thoroughly clean both body and sleeve.
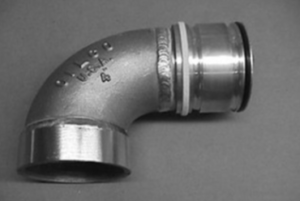
STEP 2: Install the new “O” ring on the sleeve (this is the product/pressure seal to be placed up front – the initial contact of the body and sleeve). Then install the dust seal at the rear of the sleeve. For the 80 Series, the dust seal is felt material. For the 880 Series, the dust seal is rubber material.
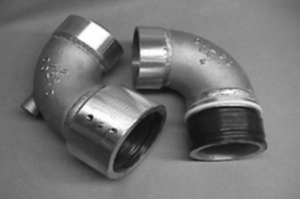
STEP 3: Lubricate the body and sleeve with Molylube® grease or an equivalent.
Note: See above section ‘Lubrication guidelines’ the front page for lubricant information and recommendations.
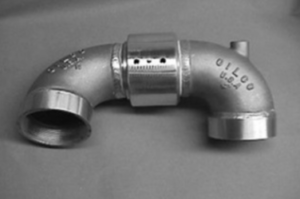
STEP 4: Insert the sleeve into the body while slowly rotating it into position. Take caution while applying force to pass the radial ball bearing grooves and seat the main pressure seal properly. If the sleeve becomes hung up, remove and re-insert. Be careful to maintain even pressure and plumb alignment.
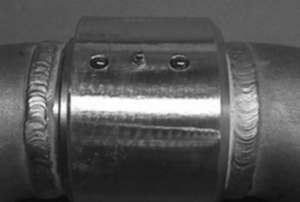
STEP 5: When the sleeve is fully inserted, feed the ball bearings into the raceways. Insert a flathead screwdriver (or bearing tool) and rotate the joint to make space for the balls (be careful not to damage the threads or scratch the raceway surface). Then reverse rotation to insert the remaining balls.
Note: There will be a slight gap between the last and first bearing, do not attempt to over-fill the unit.
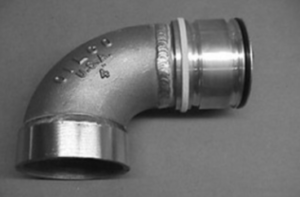
STEP 6: Reinstall the ball retainer screw until tight. If this prevents smooth rotation, back off 1/8 turn. A thread-locking sealant is recommended to prevent screws from backing off. After pressure testing, the unit is ready for installation.
OILCO: Reliability at every turn
The 80 Series is built to last, but programmed maintenance is always crucial for reducing long-term costs and protecting your investment. Proudly designed and manufactured in the U.S. since 1935, OILCO Liquid Handling Systems’ reliable products keep industries moving. From our unparalleled swivel joint line to our innovative loading arm assemblies, OILCO products are engineered to do more.
